Installing a Sliding Door Window

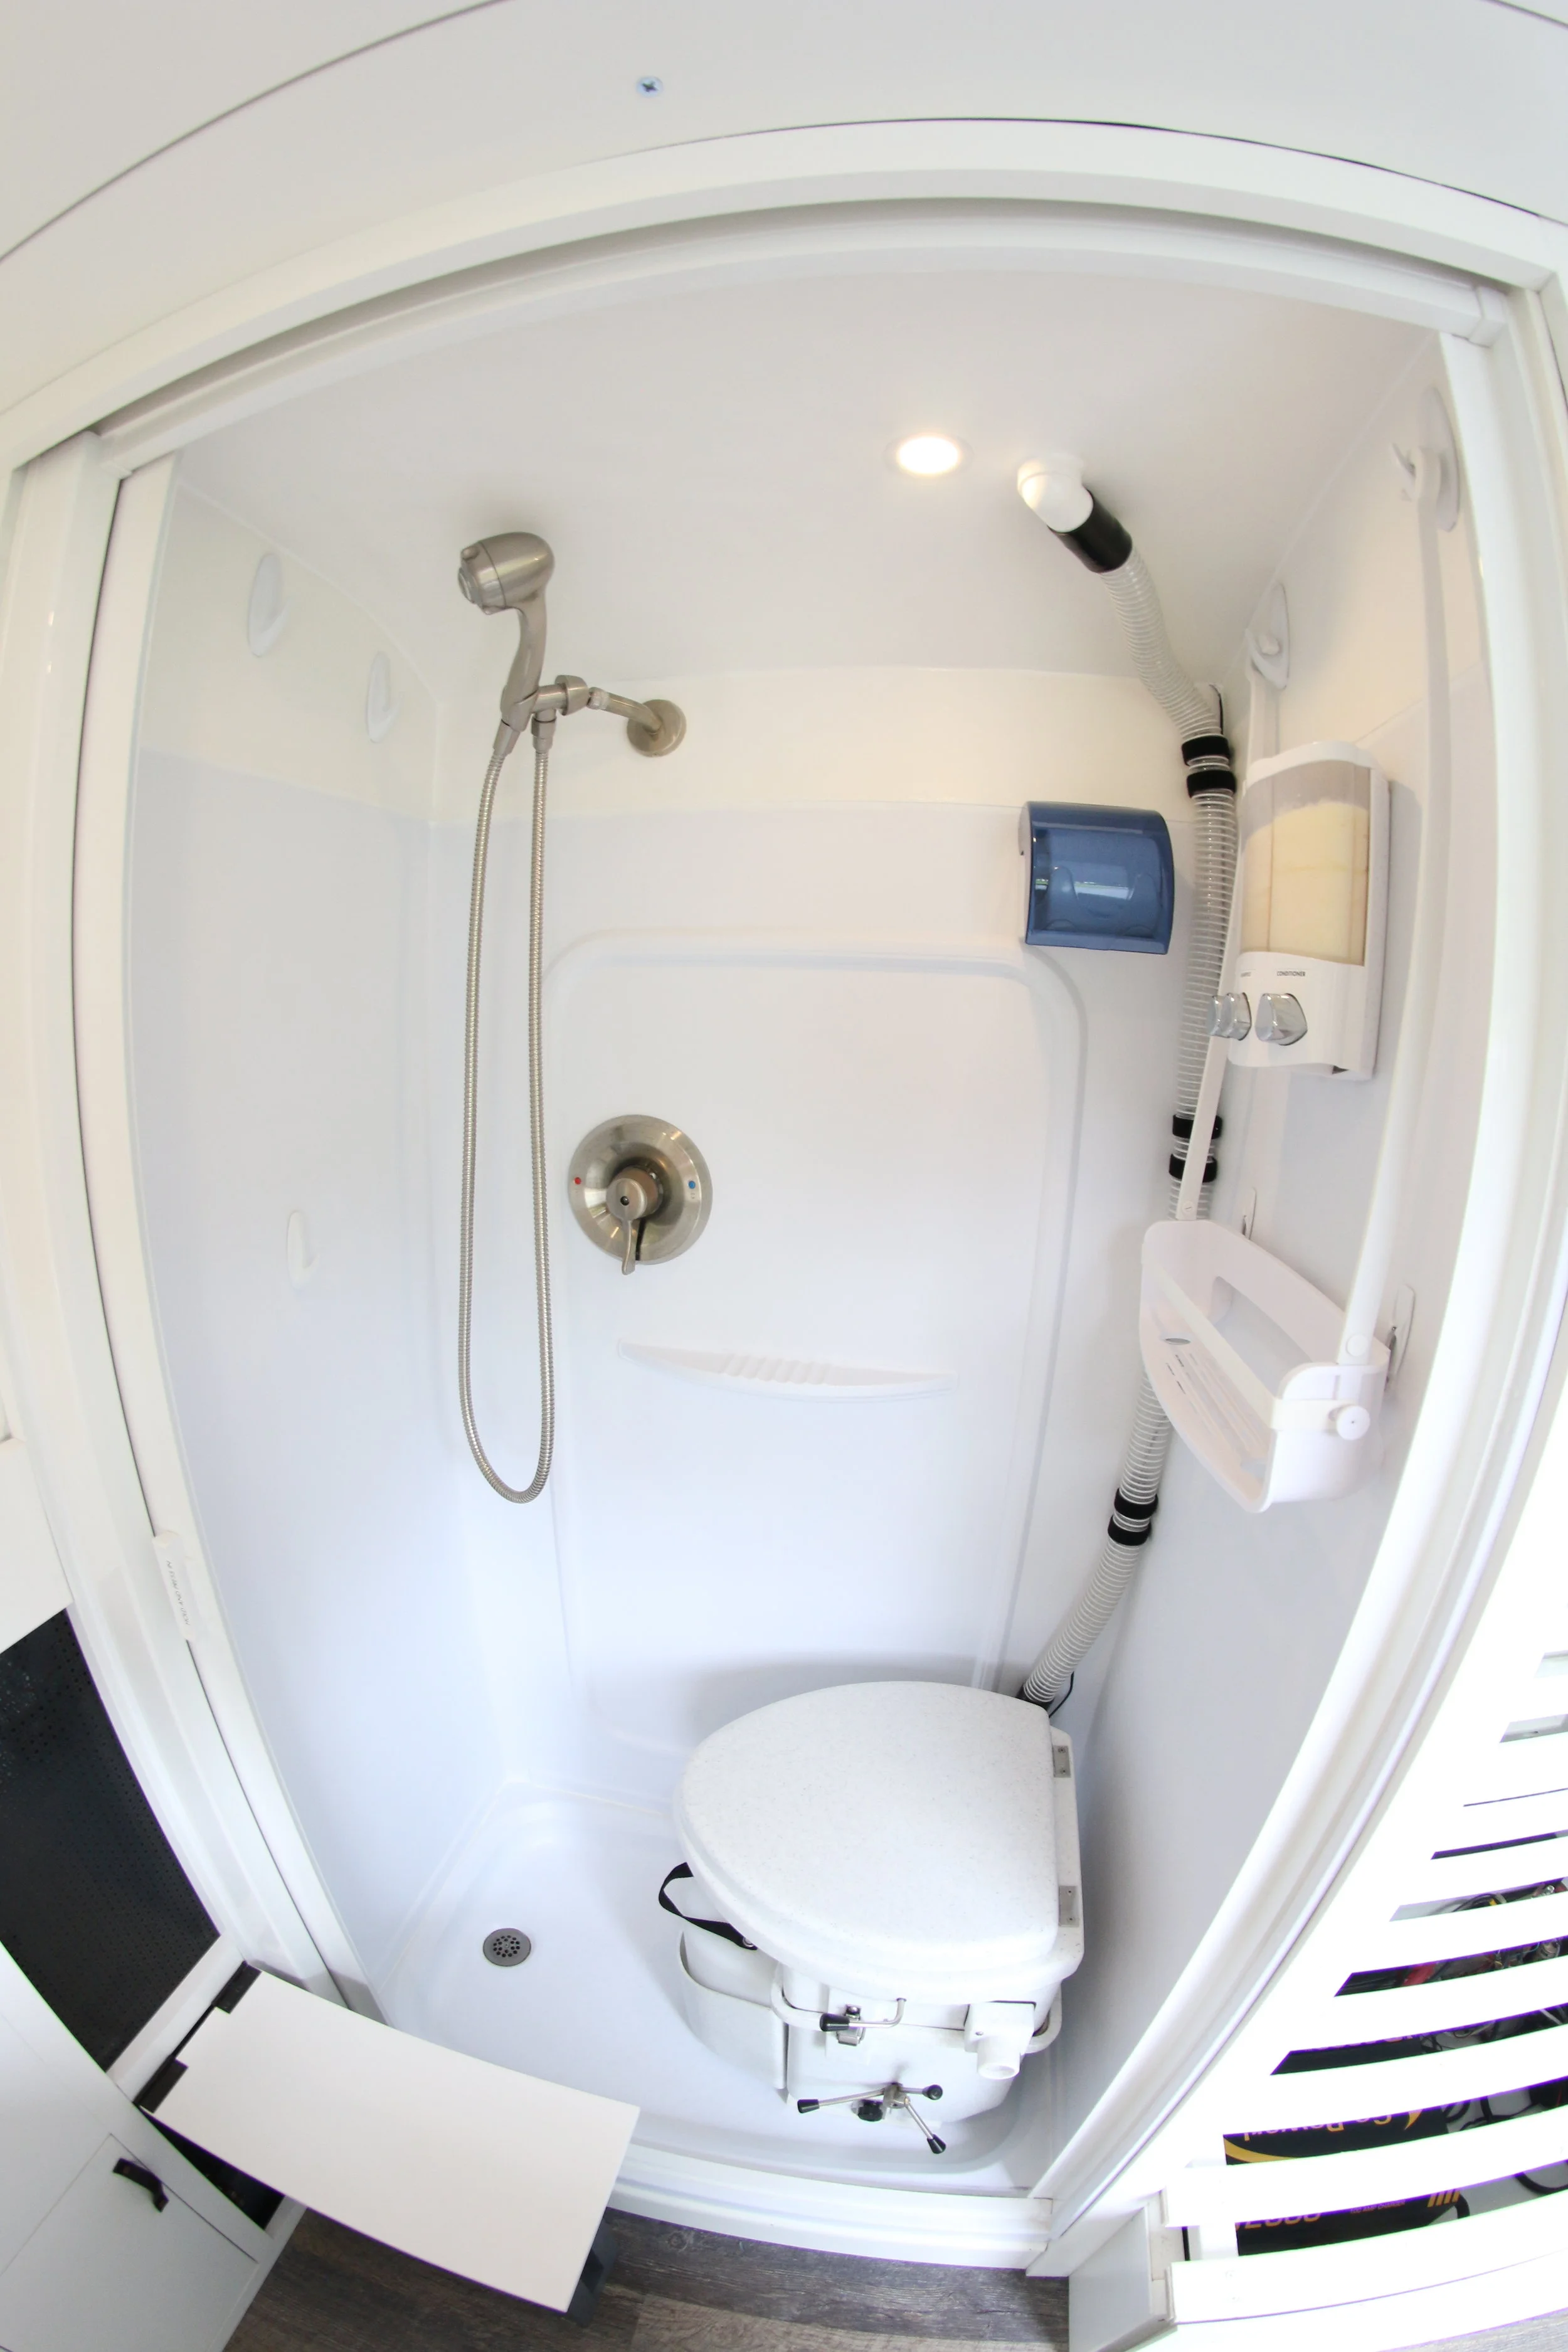
Early in the van build, we decided we wanted to have a window in the side door. We oriented our couch to face the sliding door window so even with the door closed we could see outside. We also knew a window with a vent and a screen was important for encouraging air circulation without having to open any doors or the front windows.

We use the vented window for air circulation daily. However, the mechanism that opens the Tvent has broken once and that meant ordering a replacement part from CRL that they don’t stock and had to manufacture. We are not sure how it happened. It could have been from shutting the sliding door with the window open too often, over tightening the window when closing it, or something else we haven’t thought of. We are trying to be a bit more careful with the window now to prevent further breaks.

Part List:

Checking the fit of the plywood template.

IMPORTANT: There is an area on the inside of the sliding door on the Promaster that looks like you can just cut along the edge to match the window contours, but it is slightly the wrong dimensions.  Don’t do this! 

It is helpful to have a second pair of hands for this installation as the window is unwieldy and having someone hold the window in position while it is screwed in is nice.

Our strategy to install the window was to create a template of the window and use this template to cut out the exact hole that was necessary in the sliding door.

We measured the outer dimensions of the window, marked it on 1/4” plywood, and then cut it to size. We checked our cut by setting the window on the plywood to ensure we had it right.

Then, we measured from a bunch of places from the interior ring of the window to the edge of the window and marked the measurements on the plywood to create a template for the hole we would cut out of the van. We also measured the length and width of the hole that we would cut to double check our measurements.

We created paper templates of the curvature for the corners in order to cut these correctly into our template. Once we had the curves and lines for the hole drawn on the plywood, we cut it out using a jig saw.

Once cut, we made sure that the window fit into the hole and that the edges of the window lined up with the edges of the template. It is important that the window fits into this template snugly as you can always take off more material after you cut, but you can’t get it back if you cut too much off.

Corner curvature template construction

Curves being added to the window cutout template. Ignore the cut on the top left of the photo; this was just scrap plywood we were using.

Lining up the template and ensuring it is level and even.

Then we placed the plywood template on the sliding door and lined up the edges with where we wanted the window to be located. The front and back of the big window pane were lined up with the edges of the sliding door. Everything else was roughly centered in the area contoured for a window. We secured the plywood template to the sliding door using duct tape. We double and tripled checked the template was centered and level. You may want to place painters tape under the plywood on edges so it does not scratch the paint,  although it will be covered by the window in the end.

We taped trash bags inside the van to catch metal shavings that were created as we cut the hole.

Probably our best decision when installing the window. Easy clean up.

First, we took a small drill bit and drilled a pilot hole near the corner of one edge of the cutout. We made sure it was far enough away so we could get a large 3/8” to 1/2” drill bit in there without hitting the edge of the template.  Then the pilot hole was widened with the larger drill bit. We knew the pilot hole was large enough when a sheet metal jig saw blade fit. We repeated the process for the other 3 corners of the template so we had 1 hole at each corner large enough to accommodate a jigsaw blade.

Drill a pilot hole near the corner of the template.

Drill a pilot hole near the corner of the template.

Widen the pilot hole so it is large enough to fit a jig saw bit.

For the sheet metal cut, we made sure to have a suitable sheet metal blade for the jigsaw as well as backups if the first got dull. We used the jigsaw to begin cutting from one of the drill holes we made and hugged the edge of the template, without cutting into the wood. We had to make multiple passes with the jigsaw to get the corners correct. We also made multiple starting cuts from each of the corner drill holes instead of trying to do one continuous cut.

Tracing the template for the window hole. We need additional passes on the bottom to match the curve of the template.

We then removed the sheet metal we cut (and did a victory dance) and sanded down any burs or rough edges. We then tested to see if the window fit in the hole we cut.  We cut it a bit conservatively the first time and had to remove more material by cutting and filing the edges.  Once the window fit, we made sure to file down all sharp edges, then used sand paper on the edges that were just cut.  Using metal paint, we painted the raw metal edge and let it dry to prevent rust.

That is a big hole

Trimming some excess metal off with the jig saw.

Filing down sharp edges before sanding.

After the cutout was the perfect size, we placed the window into the hole. We placed the bracket with screw holes over the inside edge of the window and started to screw it in. It was helpful to have someone support the other side of the window until it was secured. Some of the screws took a bit of work to get in, but I’d recommend hand tightening them to ensure the heads do not get stripped.   We then tested the window’s seal by spraying it with a hose to ensure there were no leaks. This window has a gasket and did not require any window weld or similar treatments.  We have had no issues with leaking with ours. 

Attaching the bracket to the window.

We now have a nice looking window with a vent!

Looking good

If you have any questions or something isn’t clear, please feel free to comment below, send us an email or find us on Facebook or Instagram! We would love to hear from you!

Driving Area Upgrades

The Promaster we found was the base model so we knew we wanted to make a few adjustments to the cab area. We ended up replacing the radio, installing a backup camera, installing cruise control, putting the seats on swivels, and adding nicer looking floor mats.

Radio replacement:

The radio that came with our Promaster was a terrible single din radio. We knew we wanted something that could connect to our phones, play music off a SD card as well as support Android Auto/Apple CarPlay. There were many options that would work for us but we settled on the Pioneer ACHNEX-4200 (there are newer models now such as the 2550NEX). Note, if your Promaster has a stock radio with steering wheel mounted controls, this part list is not correct and other parts are required.

Part List:

The first step was to disconnect the battery so we could get rid of the stock Promaster radio. There are two small holes on either side of the stock radio intended for a special tool for removal. We used a bent metal cloths hanger, inserted the ends into the holes, and the radio popped out. The radio is attached by a few electrical connections in the back that you can remove once the face of the radio is off.

In order to have space to install the dash kit for the new radio, the storage shelf below the radio had to be removed. The dash kit allows a nice original manufacturer look to the radio trim and secures the new radio.

Before the next step, we looked up the designation of each of the wires coming off the new wiring harness. This info was included in the radio installation instructions and it seems the color coding is generally consistent between brands.

We connected the same color wires by twisting the ends together and ignored some wires from the new radio that did not apply to our installation (rear speakers, etc). We then plugged the radio harness into the van plug and tried to boot up the radio. It worked!

We tested our wiring.

And it worked!

The only connection we had an issue with was the auto dimming feature. It is supposed to change the brightness of the stereo when you turn on lights or adjust the brightness of the dash. Honestly, we don’t really miss it and just have the brightness set at one level or have it auto adjust at a set time (around dusk/dawn).

Next, we soldered the connections we had originally twisted together, from the wiring harness wires to the radio wires, and used heat-shrink tubing to protect the connections.

Soldering the wiring harness

Heat shrink tubing for the soldered wire connections

An important part of getting this radio for us was easy access to Android Auto and/or Apple CarPlay, which the new radio supports. The Promaster has two USB ports. We decided to wire the one to the right of the steering wheel to the new radio. It required removing the existing USB cable from its housing (which required taking the dashboard apart further) and running a new USB male to female cable. We secured the new USB cable to the existing housing and it allows us to easily plug in a phone for navigation or music.

Once we had everything tested and functioning we reassembled the dash, installed the dash trim kit and inserted the radio.

Testing all the wiring before installing and putting the dash back together.

Many dash pieces had to come off to run the USB cable!


Back up camera:

We purchased a back up camera from Reversecamera.com, but right now they do not seem to stock any Ram Promaster reverse cameras. I found an identical looking back up camera on Amazon (Buy on Amazon) which appears to be the same one I purchased but available from a different vendor.

Part List:

The back up camera we purchased mounted as part of the middle running light above the rear doors. It gets sandwiched between the light and the sheet metal, similar to how the OEM factory back up cameras are installed.

We first unplugged the middle light above the rear doors from the inside. The power cable has a clip that can be unplugged, then the light is unscrewed from the outside.

The camera video connection behind the radio.

The camera video connection running to the back of the van.

We next removed the radio (that we just installed) and ran the camera display wire from the radio compartment to the rear of the van. It was run below the steering wheel, through the dash, and up the A-pillar over the drivers side door, before hitting the ribs of the van which would carry it all the way to the back. We also tapped into the brake light wiring in the rear of the van to provide a signal of when the van was in reverse.  That signal is used to automatically pull the back up camera display on to the radio.

We connected it all, loosely put the radio back in to the dash and tested it out. It worked!

Ripping apart the dash, yet again

The display and power/sense wires ran through the A-pillar to the rear of the van

Testing Testing 1,2,3

Looks stock to me!

 Cruise control:

The installed cruise control stalk.

The control box. We mounted it behind the dash, in the space to the left of the steering wheel.

We decided we wanted to have cruise control because we anticipated that we would be driving long distances on highways at times.  In retrospect, we don’t use it as much as we thought we would.  It works fine, but often times we are driving up and down hills/mountains and it is not so useful there.  The cruise control works pretty well, but some times it overcompensates and upshifts more rapidly than I would like or overshoots the requested speed briefly (usually on hills if you keep it on).  A fully built Promaster conversion can be heavy and the engine has to work at times on steep roads.

Part List:

The installation is fairly easy and comes with illustrated instructions. 

We mounted the control box behind the dash and plugged it into the ODB2 port. We mounted our control box near the steering column in an empty space with adhesive velcro.

Only one wire had to be soldered to the ignition to provide power and we drilled a small hole in the steering column to mount the cruise control stalk.

The rest of the installation involved plugging the power wire, the ODB2 wire, and control stalk wire into the control box using the attached connectors.

The power wire that must be soldered. The rest is plug and play, except for cutting a hole for the cruise control stalk.

ODB2 plug and extension, so you can still use the port.

Floor mats:

This may be the easiest upgrade we made to the van.  

Part List:

We ordered a mat from Lloyds which was custom cut to fit the dimensions of a Promaster front area. The front of a Promaster van is a magnet for dirt and there are a lot of crevices that are hard to clean.  We chose a mat that has depth to catch water, dirt, mud and rocks.  We can easily vacuum it out or take the whole mat out of the van and shake it out.

 Swivel seats:

Swivel seats were an easy way to add more seating to your van when parked and open up the limited square footage for not that much money.  We did research and wanted to ensure we could swivel the seats with the driver and passenger doors closed (some apparently need you to open them slightly). Our only dislike of the swivels is that they add a few inches to the seat height so Sarah’s feet do not rest all the way on the floor when she is driving. It is possible to buy a shorter seat base to lower the Promaster seats.

Part List:

We decided on the Swivels R Us swivels.  We ordered them online and received them promptly.

The installation process was relatively straightforward.  We disconnected the battery before starting and left it disconnected for at least 5-10 minutes.  We were unclipping the airbag sensors and wanted to ensure there was no chance of them going off. 

We unclipped the yellow and orange wires under the seat that run from the seat to the floor.  These are the airbag sensors.

The factory Promaster driver and passenger seats have a base and a top.  The base is bolted to the floor and the top is bolted to the base and contains the seat as well as the sliding mechanism to adjust the seat.

We removed the top of the seat by undoing the bolts in the below photos.

These bolts connect the seat itself to the base.

We then placed the swivel seat in the correct orientation on the base and then installed the original bolts. We had to twist the swivel to be able to access the bolts.

Lining up the swivel seat bolts with the seat base. You can see the unplugged airbag sensor wires below.

Next, we reinstalled the top seat to the swivel using the provided hardware and reattached the airbag sensors.  The airbag sensors should run through the open circle in the middle of the swivel seat base.

A wrench and an allen key allow you to reattach the top of the seat to the swivels

Use the provided hardware to attach the seat top. Reuse the black hardware to attach the swivel to the seat base.

Bonus seating

If you have any questions or something isn’t clear, please feel free to comment below, send us an email or find us on Facebook or Instagram! We would love to hear from you!

Installing And Using A Composting Toilet

One of the decisions we made for our van was to go with a composting toilet to remove the need for a black water tank.  We weren’t excited about the prospect of needing to empty a black tank frequently as well as the extra weight and space needed for another tank.  We’ve been very happy with our composting toilet.  We have to empty the liquid container every 1-3 days with regular use (depending on hydration and location) and the solid bin every 3 weeks to 2 months, for full time use (only using the composting toilet) to intermittent use (using some public bathrooms).

Part List:

Composting medium options we have used:

  • Coconut Coir (Buy on Amazon or at a local nursery)

  • Peat Moss (Buy at a local nursery / home improvement store)

We installed the composting toilet in our shower. We wanted to avoid drilling holes in the shower pan base so we fabricated supports for underneath the toilet that attach to the floor using industrial strength Velcro. We used PVC cellular trim because it cuts and can be screwed into like wood but it won’t degrade like wood in a wet shower.

IMG_20180111_110418937_HDR.jpg

We cut the trim to size, drilled pilot holes, and screwed in the provided Nature’s Head angle brackets that secure the toilet. We sealed the screws with silicon for extra protection against water seeping in to any cracks and causing mold.

The angle brackets are attached to the PVC supports and the feet are ready to be mounted in the shower.

The angle brackets are attached to the PVC supports and the feet are ready to be mounted in the shower.

We attached the PVC supports to the floor using industrial strength velcro. They have held up well and keep the toilet securely attached to the shower pan. If I did it again, I would extend the PVC supports a bit further because there is a bit of wobbly movement of the toilet due to the fact that the front sticks out over the end of the supports, but the toilet has never come loose.

Dry fitting the toilet before attaching the industrial strength velcro.

Dry fitting the toilet before attaching the industrial strength velcro.

We drilled a hole through the roof of the shower and van to allow the exhaust hose to exit to a standard RV vent. By using butyl tape between the van roof and the Nature’s Head exhaust hose flange, and again between the exhaust hose flange and the RV vent, we prevented any water from seeping through. The RV vent base is slightly larger than the exhaust hose flange so by screwing the RV vent into the roof through the butyl tape, it held the exhaust hose flange in place.

The RV vent was sealed using Dicor Self Leveling Lap Sealant and all exposed butyl tape was covered. We added a bug screen below the cap of the exhaust port and secured it using a hot glue gun (although many other ways could be used to secure the screen it). We wanted to make sure nothing was getting in.

Inside the van, we used PVC elbows to attach the exhaust hose to the flange in the roof and to the exhaust hose port on the toilet. PVC elbows are not necessary but they made the hose fit better and stay out of the way in our installation.

When we shower we put a PVC end cap over the air intake fan to avoid pulling moist air into the toilet. Before we added this to our routine, we didn’t have any issues but it seems like a decent idea to keep the compost medium dry.

We added a bug screen to the vent. You can see the Nature’s Head provided flange behind the bug screen. The flange sits on top of the roof with the 1 1/4” tube sticking inside the van.

We added a bug screen to the vent. You can see the Nature’s Head provided flange behind the bug screen. The flange sits on top of the roof with the 1 1/4” tube sticking inside the van.

More Dicor Self Leveling Sealant was added after this photo to cover up all of the butyl tape.

More Dicor Self Leveling Sealant was added after this photo to cover up all of the butyl tape.

Some frequently asked questions:

Where do you dump the liquid container?

Public bathrooms or pit toilets (it has a cap and can be placed in a bag to not draw attention).

The middle of nowhere when dispersed camping.  We sometimes scatter it around plants, well away from trails, campsites, water sources, etc.

The grey tank.  We can dump it down the shower drain and store it in the grey tank, until we go to a dump station.  We prefer to avoid this as it smells up the van while you are pouring it, though it goes away quickly if you run some water down the drain.

Where and how do you dump the solid container?

We usually change the composting medium when dispersed camping to avoid stares, but we have also done it in a Home Depot parking lot (see below).  We almost always dump the used medium in a trash bag and throw it out, as the composting hasn’t finished.  Biodegradable bags would be best to use if you throw it out.   We have also dug a very deep (2 feet) cat hole one or two times in very remote areas and buried the waste.  I wouldn’t recommend this strategy except in very rare situations where its unlikely anyone would find or disturb your cat hole.  If you have a place to store compost you could dump the compost and allow it to further break down before using it on plants (not recommended for vegetables of fruits that humans may eat).

One of our first composting medium changes - hidden in the corner of a Home Depot parking lot

One of our first composting medium changes - hidden in the corner of a Home Depot parking lot

What composting medium do you use?

We first used peat moss for about a year and were happy with it.  We had no issues with bugs, but weren’t happy with the amount of space that the peat moss took up in the garage and that we could only buy very large bags.  We have read that people have had issues with bugs in peat moss, but we had no issues in a year of use.

We tried coconut coir as it is a lot more compact in packaging but it needs to be hydrated before use.  We place it in a garbage bag or bucket and add water until it has the desired consistency.  The first time we tried using coconut coir we tried hydrating it in the toilet and that was a terrible idea.  It almost made us swear off coconut coir as a medium and return to peat moss.  Pre-mixing in a bag or bucket is the way to go. It is a lot smaller to store, but does take a lot longer to prep when you want to change the compost medium.  I’ve read that coconut coir does not have the same potential issues with bugs as peat moss, but we actually had bugs one time with our coconut coir.  We purchased moth balls and placed them inside the toilet, which resolved our issues fairly quickly.

Does it smell?

No it really doesn’t.  Even changing the composting medium just smells like dirt, not poop. 

Pouring the liquid container out does smell like pee, but the inside of the van doesn’t smell like pee.  We spray a bit of vinegar after each pee which helps cut any potential smells and keep the toilet clean.

The exhaust fan for the toilet helps to remove any smells from the van.

Are you happy with your choice?

Absolutely.  I think composting toilets are a bit overpriced, but we love our decision to go with one of them.  Maybe next time I would build my own custom design but I’d take it over a black tank any day.

Installing a Rooftop Exhaust Fan on a Van

A rooftop fan is one of the most important upgrades you can make to a van. An exhaust fan can remove cooking odors, smoke, and heat.  It helps keep the inside of your van close to ambient temperatures with reflective window covers and adequate air flow.

If we were going to build our van again, we would strongly consider two fans, one in front (where we have it now) and one in the back of the van, above the bed.  Two fans can help with air circulation if you have one pulling air in and one pushing air out.  An added benefit of two fans would be increasing stealth by not having to have the slider window T-vent open to get adequate air circulation. Our bed can get hot from time to time as hot air can get trapped above it.  We installed a small 12v fan on the back door above the bed to push the warmer air towards the rooftop fan, which has made it more comfortable in really warm temperatures.

Part List:

First we decided where to place the fan.  Maximizing solar panels on the roof and mounting the panels on a roof rack influenced our decision about fan location.  The Promaster also has an area of the roof in the front which is flat and appears to be designed for a rooftop A/C or fan.  

Building the 2x2 support structure

It was important to create a support system for screwing the fan flange to the roof.  The roof metal is very thin so we decided to build a square out of 2x2s that would sit inside the van, flush against the roof around the flange.  The flange would be attached from above with screws through the roof sheet metal and into the wood.  The wood and flange would form a sandwich around the sheet metal of the roof.

Before we started on the fan installation, we attached our roof rack system to make sure that our rooftop fan would have enough room. It was going to be a very snug fit and we needed make the fan cutout as far back as possible. We measured the internal cutout dimensions of the fan flange (14” x 14”) and marked the dimensions on the roof in pencil at multiple points, checking to make sure they were square and centered. We used a straight edge to connect the tick marks and draw a square on the roof. A good way to make sure you do not dent or scratch the roof while working on it is by sitting on a piece of plywood on top of a towel or painters cloth. The plywood distributes your weight and the towel or cloth keeps the wood from scratching the paint.

Checking the flange fit and placement

The corners of the fan flange, which inserts into the hole in the roof, are curved.  We placed the flange on top of the roof at our square drawing and traced the curvature of the corners.  We checked the fit a few times by lining it up with the pencil lines and confirmed the location of the potential cutout in relation to the roof rack.

We drilled pilot holes with a small drill bit (1/8”) near each corner of the cutout. We made sure that the holes drilled were slightly away from each corner to ensure that widening them would not cut outside of the outline of the flange.  We enlarged the holes with a drill bit to make them large enough to accommodate a jigsaw blade.  A 1/2" drill bit was sufficient. Taping a trash bag to the ceiling inside the van under the section of roof where we cut made clean up easy.

Drilling pilot holes which will be widened in order to fit the jig saw blade

Cutting the hole in the roof for the flange. Painters tape protects the van roof from getting scratched by the jig saw

We used painter’s tape on the roof to prevent damage from the jigsaw around the edge of the cut line. 

We started by inserting the jigsaw into one of the corner holes and began cutting. We made multiple passes for each corner so we didn’t have to twist the jigsaw blade too much.  Once the cut was almost all the way around we carefully cut the last piece and had a nice hole in the roof of our van. It was helpful to have someone inside the van support the metal cutout so it did not fall down and take the trash bag catching metal pieces with it.

We then test fit the fan flange into the hole in the roof. Adjustments were made to widen the hole slightly where it where it did not fit using the jigsaw or a metal file.  Once it fit, we removed the flange, filed down any burrs and sanded to remove sharp edges. 

We used a metal paint/primer over any exposed metal and allowed it to dry to prevent rust. We removed the trash bag to have access to the roof hole from both inside and outside.

Painting the exposed metal after filing and sanding down

Securing the flange to the roof with the 2x2 support structure

We lined up the wood support we built and put the flange in place.  Using multiple clamps we secured the wood support and the flange.  We drilled pilot holes through the sheet metal and into the wood support piece. 

We removed the clamps, flange and wood support. We cleaned any metal or wood shavings and cleaned the area where the flange touches the roof surface with rubbing alcohol.

There are a variety of ways to discourage water from entering, but our method has worked for two years with no leaking and no maintenance needed (yet).  We applied two layers of butyl tape around the edge of the hole in the roof, ensuring that the entire width of the flange would be over butyl tape when we installed it and screwed it down. We overlapped on corners to ensure there wouldn’t be an easy way for water to enter.  An x-acto knife or box cutter can be useful for cutting or trimming the butyl tape.

We then placed the flange in the hole with the wood support and secured it with clamps again. We screwed the flange through the roof and into the wood using the pilot holes and tightened it down.  We then removed the clamps and trimmed any excess butyl tape that squished out from below the flange.

Then we sealed all of the tops of screws and the edges of the flange with RV self-leveling lap sealant.  This type of sealant flows and settles a bit to fill in any voids or gaps in coverage and remains somewhat flexible throughout its life.

Butyl tape and dicor self leveling lap sealant applied

We examined it to be sure that there were no gaps or ways for water to get through cracks.  We let it dry and installed the fan into the flange.  Ours required sliding it in and screwing in two retaining screws per side which hold it down against a gasket.

We finally tested the waterproof seal with a hose and there were no leaks!

Fan wired to the starter battery. Just for testing, not for usage beyond that.

Wiring the fan was fairly simple and just required a fused connection to the house battery bank.  We tested ours on the starter battery, but would not recommend doing this for extended periods of time, due to the risk of draining your starter battery.  We ran ours through a DC distribution panel.

If you have any questions or something isn’t clear, please feel free to comment below, send us an email or find us on Facebook or Instagram! We would love to hear from you!

Creating Stealth and Reflective Van Window Covers

When building the van the term, “stealth camping” popped up. Stealth camping is over nighting somewhere illegal or frowned upon so campers try to be as subtle as possible about living or sleeping in a van. Blackout window covers are essential for this to block any light from inside the van being visible outside the van.

Black out window covers engaged, though stealth wasn’t required at this dispersed campsite. The reflective side helps a bit with keeping the van warm for cold nights, which is why we had them turned this way.

On the other hand, reflective window covers do an excellent job of keeping the sun from heating the inside of the van and help with temperature regulation. Both sides ensure privacy.

Reflective window covers do a great job at regulating inside temperature, especially when used with a rooftop fan that can exhaust hot air.

We needed reflective window covers here, just outside of Badlands National Park with temperatures in the 90s.

Part list:

Reflectix Unfaced Reflective Insulation (Buy on Amazon)

Black Duck Cloth – Buy at a Fabric Store

3M Super 90 Spray Adhesive (Buy on Amazon)

Neodymium Magnets (Buy on Amazon)

Polypropylene Webbing – Buy at a Fabric Store

The process:

Starting on the back windows was the easiest option. I made templates out of poster board. The templates were made to cover the whole window and overlap onto the metal lip surrounding the window. The idea is that the magnets will attach to the metal lip around the window.

I took the template and used it as a stencil to trace the outline onto the Reflectix using a permanent marker and then cut out the Reflectix using regular kitchen scissors. We then compared the cut Reflectix to the window to check I got the dimensions right.

Since the back windows are identical, I used the template to trace another outline and cut out another piece of Reflectix for the other back window.  

Next were the side windows in the cab. I repeated the process while making sure to leave enough overhang where magnets could attach to metal. I made a template, traced the outline of the template onto Reflectix, cut out the Reflectix, checked my cut, and made a second cutout for the opposite window.

I repeated the same process for the sliding door window.

The windshield was the hardest to create a template for because it is so big. I recommend leaving an extra inch, or even more, around your template when you cut the Reflectix, for adjustments because it was so hard for me to get a good template. Because we still have our rearview mirror up, I made a very small cutout to accommodate it.

After all the Reflectix shapes were cut out and checked on the windows, I used them as stencils for the black cloth and traced them with a white pencil. While doing this, I had to be mindful that the side cab windows needed to be mirrors of each other and the sliding door window blacked out the most light in one orientation. The orientation of the black cloth shape mattered.

With the black cloth cutouts ready to go, I sprayed 3M Super 90 adhesive on the Reflectix piece then smoothed the black cloth over it, being careful to line up the edges.

Andrew’s mom showed me how to use the sewing machine, so then I stitched one line about a half inch from the edge all the way around each window cover. I did this as a backup to the Super 90 because I wasn’t sure how well it would adhere.

I used polypropylene webbing as the edging for each piece by running it around each window cover and folding it over the edge. I used straight pins to hold it in place and then stitched it on with the sewing machine. Corners were especially difficult. Next time, I will melt the ends of the webbing before I stitch it on to prevent fraying.

Before adding magnets, I took the covers to the van and made notes on where they actually touched metal. The back window covers were easy because of the metal lip around the windows. The side cab window covers only touch metal on the back edge and some of the top edge. The sliding door window cover touches metal on almost all edges. The windshield window cover doesn’t touch metal at all.

To add magnets, I stitched 2 parallel lines perpendicular to the edge of the cover, just wide enough apart to accommodate the magnets I chose. Then I took a seam ripper and ripped out the stitch holding the webbing only between the two parallel lines.

Close up showing a bagnet and the stitching on the edge of a front side window cover

I shoved magnets into the small pockets I had created on both sides of the window cover. This way they would be strongly attached no matter which side was facing out.  I then stitched across the top of the parallel lines to make sure the magnets stayed in.

Front side door window cover, reflective side

Front side door window cover, black out side

For the windshield, I didn’t use any magnets because there was no metal to attach them to. Instead I stitched Velcro to the window cover over the polypropylene webbing and stuck the opposing Velcro sides to the windshield. The velcro works well, except when it gets very hot. I used industrial strength velcro and at times the adhesive has melted and we have had to reapply. If I were to do it again, I would either cement magnets to the edges of headliner or the windshield or find a different adhesive method for the velcro.

Testing our rear window covers. Lights are on full blast.

Rear window covers on now, and can’t see a thing. Lights are still on full blast.

Why I Chose These Materials:

I knew we needed a reflective window cover at certain times because of their ability to regulate temperature inside the van for both us and Billie as well as to protect the dashboard and inside from direct sunlight. Reflectix is a good choice for reflective insulation (but misused by many people building vans!), was easy to find, and seemed very similar to what the average car window cover is made from. With the reflective window covers up on all windows, our sliding door T-vent open and our rooftop fan on full blast, we can keep the van within a few degrees of ambient temperature on hot and sunny days. This is very important for keeping yourself comfortable and a pet safe inside the van.

For the other side of the window covers, I knew I wanted black cloth because in the dark it makes the van look like no one is in it. A pattern would be more fun but black draws less attention. I knew I wanted a heavy fabric that could stand up to a lot of sunlight so I wandered around a fabric store until I found duck cloth which is just a heavy cotton canvas. After a year and a half of use, the black has faded a little bit not terribly.

Magnets seemed like the obvious choice for attaching the window covers to the windows because they didn’t do any damage to the van. They are also relatively cheap and easy to find. The Velcro for the windshield was also the least destructive method.

One other thing I would do differently is the polypropylene webbing. If I used it again, I would definitely burn the ends so it didn’t fray. It also doesn’t do well with anything that isn’t smooth. It is looking a little worn but generally holding up better than expected.

If you have any questions or something isn’t clear, please feel free to comment below, send us an email or find us on Facebook or Instagram! We would love to hear from you!

The Plumbing System

From the start of the van design phase we knew we would have somewhat complex plumbing needs. We planned to have an indoor shower, an outdoor shower, a sink, and a hot water heater. We also decided to install water filters so we didn’t have to worry about water quality and would be able to fill water from unknown sources.

Wet bath with shower and composting toilet. Marine drain pump brings shower water to grey tank

Fresh/grey tanks, outdoor shower, hot water heater, water filters, fresh water fill in garage of van

Kitchen with sink and gravity drain

Here is a plumbing schematic showing the lines, components, and how everything fits together. There is also a list of parts used below.

Parts List:

Lets run through the main components of the system and how they were installed:

Fresh and grey water tanks:

To size our water tanks we tried to estimate our usage. Our goal was to be able to stay off grid for at least a week.

We’ve created a interactive water capacity calculator that you can use to estimate the water capacity needed for your build. You can edit cells and the spreadsheet will update automatically.

We estimated we would shower every other day for a bit over 2 minutes of water each (military showers), use a trickle of water for about one gallon of water per day to wash dishes, and drink about a half gallon of water per person per day.

A week of usage at this rate would be 38 gallons, and usually water tanks can not be drained to the last drop or filled up all the way so we needed a size over 38 gallons.

After traveling for over a year and a half we have realized our water needs vary a lot between seasons, activity levels and based on where we are. If we take showers every other day, we can usually last at least 8 days before needing to dump and refill water. If we aren’t showering as often, have access to outdoor showers, or accessible drinking water for daily consumption we have gone as long as 3 weeks before needing to refill water. The fastest we have needed to refill was 5 or 6 days, and we were taking showers almost every day as it was hot and we were exercising a lot.

Where to install the water tanks was another important decision to make before the tanks were purchased. There are a variety of sizes and shapes available. We elected to mount our grey water tank in the garage next to the wheel well and the fresh water tank above the wheel well. Installing the tanks inside the van was important for us because we knew we wanted to travel in freezing temperatures without the need for tank heaters or winterizing (and the associated lack of ability to use plumbing).

Finally, we had to ensure that the water tanks have enough inlet and outlet ports to provide for all our plumbing needs. For our grey tank, we needed to have a large outlet for draining the tank, a method to vent the tank, a large inlet for a sink gravity drain, and an inlet for the grey water from the shower. For our fresh tank, we needed a method to vent the tank, a large inlet for filling the tank, and a small outlet for the pressurized water lines.

We found two 46 gallon water tanks from Class A Customs (one for fresh water, one for grey water). They fit, were large enough, and were surprisingly cheap compared to some of the other options. We’ve had no issues with them and recommend their company’s products.

Roughing in the water tanks and checking fit/placement

Hot water heater:

We decided to go with an electric hot water heater and decided on the Isotherm SPA 20. It has a 750w heating element and a capacity of 20 liters. It can be hooked up to your engine’s coolant loop to heat the water while driving and uses a thermostatic mixing valve to set the hot water temperature. We chose to not connect it to the coolant loop to avoid any warranty issues with the van as well as the fact that we have the engine alternator connected to the house battery bank. With the alternator connected to the house bank, we can charge our batteries (or cover the hot water electrical demands while driving) which is quite similar to using engine coolant for heating the water (using coolant to heat the water should heat to a higher temperature and a bit more quickly, so there are some benefits to a coolant hookup).

We have found it takes anywhere from 45minutes to 1hr15mins to heat the water. The time depends on the ambient and water tank temperature. We have taken 4 hot showers back to back (a total of ~10-12 gallons of water used) and the water was still hot at the end.

The trickiest part of this installation was that we needed a BSP (British Standard Pipe) to NPT (National Pipe Thread) adapter as the hot water outlet is BSP thread and anything you purchase in the US will not be BSP.

We installed a check valve on the cold inlet of the hot water heater to prevent hot water from moving backwards through the lines. We also installed a method to drain the hot water heater in case we needed to remove all the water from our system (to winterize for example).

We used an existing body hole in the van for the drip/drain hose that is required and didn’t have to put any more holes in the body! A very small amount of fresh water drips out of this hose when the hot water is close to being ready, which is part of the hot water heater design.

Hot water heater in place and plumbing being installed

Squeezing all of the plumbing into as small a space as possible below the hot water heater.

Shower plumbing:

Our shower plumbing is a bit unique. We couldn’t use a gravity drain for the shower as we wanted our water tanks and all plumbing to be located inside the van. This is fairly common in marine settings and there are marine shower pumps which we adapted for our purposes.

We found a low profile shower drain, connected it to a Hepvo waterless trap, and then used adapters to convert the pipe to a 1/2” barb fitting. Braided nylon connects the drain to a stainless steel pre filter (which needs to be cleaned every few weeks), the pump, and then finally the grey water tank.

The fresh shower water runs to the mixing valve via 1/2” PEX with SharkBite fittings. There are ball valves before the mixing valve to shut off the flow to the cold and/or hot lines. We found a low flow 1.5 gallon per minute shower head which gives a satisfying shower, but saves precious water.

We find we can take 2-3 minute showers (amount of water run time) which helps us stretch our fresh water tanks as long as possible. We get wet and then turn off the water. Then we shampoo and soap up and then rinse off. We try to limit the amount of time the water is on when we don’t need it.

The start of the shower plumbing. 1/2” PEX and shark bite fittings were used along with home shower mixing valves.

Our shower drain pump. A stainless steel mesh filter is mounted before the pump, which needs to be cleaned every couple weeks.

The shower drain and Hepvo waterless trap attached.

Sink Plumbing:

The sink drain connects to a Hepvo waterless trap and then gravity drains via PVC to the grey tanks.

The idea of a Hepvo waterless trap for the kitchen drain seems great and they save a lot of space, but we have had to clean them fairly regularly (every 3 months?) as food particles seem to intermittently keep them stuck open. We try to wipe our plates before cleaning them, but it doesn’t seem to be enough. Sometimes with the exhaust fan on full blast and the trap needing to be cleaned, some grey water odor will to enter the van via the sink. If I did it again, it might consider a standard P trap to minimize the maintenance. Interestingly enough the shower drain Hepvo has had no issues, so I think it must be larger food particles. Maybe we should try to find a finer sink drain pre-filter.

The sink fresh water comes in from PEX to 1/4” faucet adapters which connect to the faucet water lines.

Sink drain connected to Hepvo and then running to 1 1/2” PVC

Hot and cold water lines running to faucet

Fresh tank plumbing:

Keeping with our theme of quasi stealth, we decided to located the fresh water fill on the inside of the van so there are minimal signs of an RV on the outside (some RVs have fresh water fill, propane vents, and shore power hookups on the outside).

The fresh water tank has 3 fittings on it. We have a 1 1/4” fresh water inlet which runs to the top right of the tank, a 1/2” vent on the top left of the tank, and a 1/2” outlet which is the bottom right of the tank.

We decided against a dedicated fresh water drain, as we can always just park on a hill and operate the fresh pump and drain the whole system further down the line. In 1.5 years, we haven’t had to drain the fresh tank or the water system once, so I think it was a good thing to skip.

Fresh water tank showing all fittings. Top left is the vent. Top right is the fill. Bottom right is the water outlet.

Fresh water fill with cap removed.

Grey Tank Plumbing:

We have a bit of a unique grey tank plumbing set up. The sink uses a PVC gravity drain to the top right tank fitting (1 1/2” NPT). The shower drain uses a pump and flows via braided vinyl tubing to the top left fitting (1/2” NPT). The bottom left tank fitting is used for the grey water drain. A ball valve keeps it closed and the PVC goes through the floor to a threaded cap with bug screen. We store a drain hose under the rear bumper and thread it on to this threaded adapter under the van.

As we already used the traditional spot for a grey tank vent with the shower drain pump, we created a grey tank vent using the PVC drain line from the sink. This also doubles as an emergency tank overflow device, which we fortunately have not needed. There have been no issues with sink drainage with this setup.

Combination sink gravity drain and vent

Grey tank plumbing at the tank

Grey water drain/vent with bug screen. The grey fitting screws off and the grey water hose screws on.

1 1/2” PVC stores our grey water hose when not in use.

Rear shower:

2 showers! It may seem excessive, but it is always nice to rinse off outside when its warm and not have to fill up the grey tank. What it is best for is washing off Billie (our dog), our bikes, wetsuits, or anything else that gets dirty while adventuring.

This was a fairly straightforward installation, just requiring running hot and cold water via PEX to the location of the shower and PEX adapters for connecting to the shower flexible lines.

The connections to the rear shower. Compression fittings on the hot and cold lines. A NPT fitting (use thread sealant) on the wand / mixed line.

It works!

Fresh water filters:

We wanted to ensure the water we used was safe and we wanted to have the ability to fill up from streams if necessary. We purchased this RV water package and installed it after the fresh water pump and accumulator tank.

The first filter (white) is a 1 micron sediment filter and the second filter is a 0.5 micron carbon filter. 0.5 micron filters should handle any cysts or bacteria in the water; the main things that get you sick when drinking untreated water. The 0.5 micron filter is also lead reducing.

We incorporated a bypass (valve below the filters) in case we decided to store the van in winter and use RV antifreeze in the lines. RV antifreeze should not be used with water filters.

The kit we used. Everything you need to install a water filter system. We just needed to get two 3/4” garden hose to shark bite fittings.

Fittings, pipe, etc:

  • 1/2” PEX for all fresh water lines and shark bite fittings for all PEX connections.

  • 1 1/2” PVC for our sink drain and grey water drain/vent.

  • 1/2” ID braided vinyl tubing for the shower drain run after the Hepvo waterless trap.

  • Many elbows, t fittings, ball valves, and barb fittings

If you have any questions or something isn’t clear, please feel free to comment below, send us an email or find us on Facebook or Instagram! We would love to hear from you!